这篇文章主要介绍下spring-boot如何集成缓存。
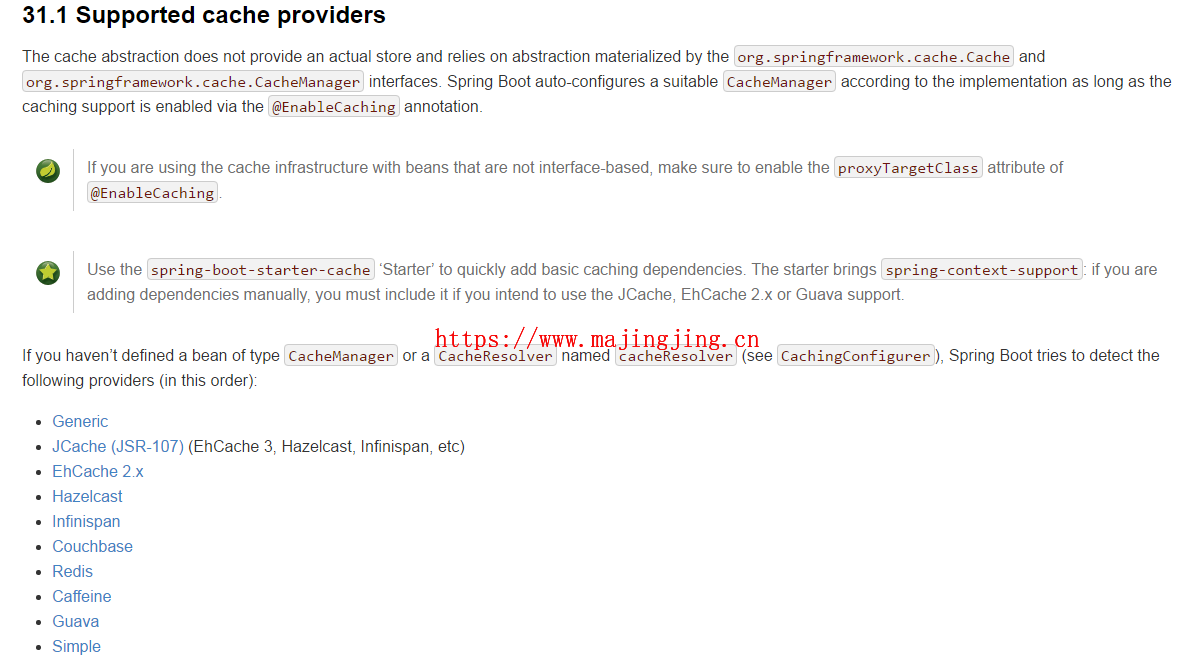
java的缓存框架有很多种,官方也都给了很多缓存的支持。

官方的这些缓存想必大家在项目中多多少少都有接触到。 由于ehcache3.x实现了jsr-107的标准接口,这里我主要介绍spring-boot下的JCache (JSR-107) 和EhCache 3的集成整合。
案例代码在 “spring-boot(五)自定义属性配置” 的基础上改造
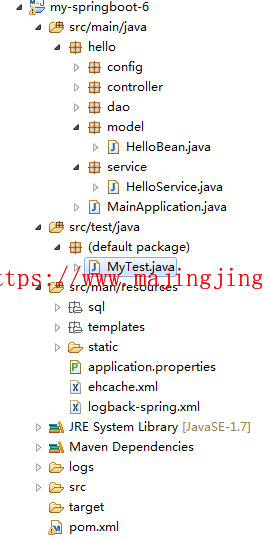
项目结构图

1。 在pom中引入依赖
<dependency>
	<groupId>org.springframework.boot</groupId>
	<artifactId>spring-boot-starter-cache</artifactId>
</dependency>
<dependency>
	<groupId>javax.cache</groupId>
	<artifactId>cache-api</artifactId>
</dependency>
<dependency>
	<groupId>org.ehcache</groupId>
	<artifactId>ehcache</artifactId>
</dependency>
<dependency>
	<groupId>org.springframework.boot</groupId>
	<artifactId>spring-boot-starter-test</artifactId>
	<scope>test</scope>
</dependency>
2。在 src/man/resources 目录下建立 ehcache.xml
<?xml version="1.0" encoding="UTF-8"?>
<config
  xmlns:xsi='http://www.w3.org/2001/XMLSchema-instance'
  xmlns:jsr107='http://www.ehcache.org/v3/jsr107'
  xmlns='http://www.ehcache.org/v3'
  xsi:schemaLocation="
        http://www.ehcache.org/v3 http://www.ehcache.org/schema/ehcache-core-3.1.xsd
        http://www.ehcache.org/v3/jsr107 http://www.ehcache.org/schema/ehcache-107-ext-3.1.xsd">

  <cache-template name="heap-cache">
    <resources>
      <heap unit="entries">2000</heap>
      <offheap unit="MB">100</offheap>
    </resources>
  </cache-template>

  <cache alias="Hello" uses-template="heap-cache">
    <expiry>
      <ttl unit="seconds">3</ttl>
    </expiry>
  </cache>

</config>
这里特别注意下ehcahce2.x和ehcahce3的配置是不同的,这也是我选择讲3的一个原因吧
3。 在service层增加缓存 (@CacheConfig,@Cacheable)
@Service
@CacheConfig(cacheNames = "Hello")
public class HelloService {
	private Logger log = LoggerFactory.getLogger(this.getClass());

	@Autowired
	Dao dao;

	@Cacheable
	public List<HelloBean> queryHellos() {
		log.info("查询了数据库");
		List<HelloBean> hellos = dao.queryForList(HelloBean.class, "select * from hello ");
		return hellos;
	}

	public HelloBean queryHello(Integer id) {
		HelloBean hello = dao.queryForObject(HelloBean.class, "select * from hello where id = ? ", id);
		return hello;
	}
}
在这里特别说明下,之前的代码 HelloBean 类没有序列化,缓存的存储是需要对象序列化的,所以 修改代码片段
public class HelloBean implements Serializable{
4。 在主启动类上增加启用缓存的注解 @EnableCaching
@EnableCaching
@SpringBootApplication
public class MainApplication {

	public static void main(String[] args) throws Exception {
		SpringApplication.run(MainApplication.class, args);
	}

}
5。 在 application.properties 中指定缓存的配置文件路径
spring.cache.jcache.config=classpath:ehcache.xml
到此缓存配置已经搭建完成,下面我们写个单元测试来看下效果。 在目录 src/test/java 下建立单元测试类
@RunWith(SpringJUnit4ClassRunner.class)
@SpringBootTest(classes = MainApplication.class)
public class MyTest {

	private Logger log = LoggerFactory.getLogger(this.getClass());

	@Autowired
	private CacheManager cacheManager;

	@Autowired
	HelloService service;

	@Before
	public void before() {
		log.info("cacheManager {}", cacheManager);
	}

	@Test
	public void cache() throws InterruptedException {
		log.info("访问了 {} 接口 , 现在时间为 {} ", "service.queryHellos()", new Date());
		service.queryHellos();
		log.info("访问了 {} 接口 , 现在时间为 {} ", "service.queryHellos()", new Date());
		service.queryHellos();

		Thread.sleep(5000);

		log.info("访问了 {} 接口 , 现在时间为 {} ", "service.queryHellos()", new Date());
		service.queryHellos();
	}

}
运行测试类,观察控制台输出
 同时我们也会看到缓存使用的是ehcache来管理的。
源代码附件: my-springboot-6.tar.gz
 打赏下吧
打赏下吧

